Top Stories
- The Finest Approach to Elevating Senses is AMUSE CANNABIS Your All Question Regarding
- Procure Edge Compute Edge Delivery and Edge Securities Services with StackPath Coupon Code
- Access Infinite Connectivity with XFINITY
- Zyro a professional website with SEO-friendly features and free hosting plans
- Adore Beauty AU Promo and Coupons Codes
- Where to Stay in Las Vegas The Best Trivago Hotels More Affordable than You Think
- It is Time to Save Big with PrettyLittleThing Exclusive Sale
- The Sonu Sleep System Side Sleeping Tech Best Mattresses for Side Sleeper
- The Best Anatomie Kenya Jacket
- Ekster Wallet or Kings Loot Wallet Which One Win
- The Best Nike Shoes Collection
- Ithemes Imperative WordPress Itheme Security Pro
- Saramart UK AU Reviews
- Top 10 Jackets by Palm Angels
- Anatomie Women Sale Items
- Find Your Perfect Peak Design
- GAME-CHANGING CAMERA ACCESSORIES
- How to Backup Your IPhone Data
- Earth Day 2018 (Facts) - A Source to Protect The World
- How to Backup Your Android Data Very Fast & Easily
- Introducing An Amazing Apple Cell Phone With Prices
- Newly Designed iPhone X Features
- Apple’s New Innovation-High In Price But Perfect In Style
- Rumors About iPhone 9 - It Brings Something New
- Wait For IPHONE 9 Is Going to Be Over Soon
- Nintendo Direct Provides A Way Towards Gaming News
- Enjoy High-Level Gaming Through Fortnite Battle Royale
- Instant Repair at Your Doorsteps
- Fastest Phone Repair Service In New York
- Six Pro Tips to Protect Your Cell Phone Screen
- 2 Simple Methods to Fix Broken iPhone Screen at Home
- Fastest Phone Repair Service in New York
- What to do When Your Mobile Responds Strangely - Fix it Up
- Ways to Keep Your Mobile Phone’s Screen Protected and Clean—Its Simple and Effective
- 5 Pro Tips To Keep Your Phone Away From Over Heating In Summers
- 7 Reliable Tips to keep Your Mobile’s Touchscreen Safe and Protected
- Most Common Smartphones Repair Seen By Smart Fix Technicians
- How to Judge When It’s Time to Replace Your Mobile`s Battery
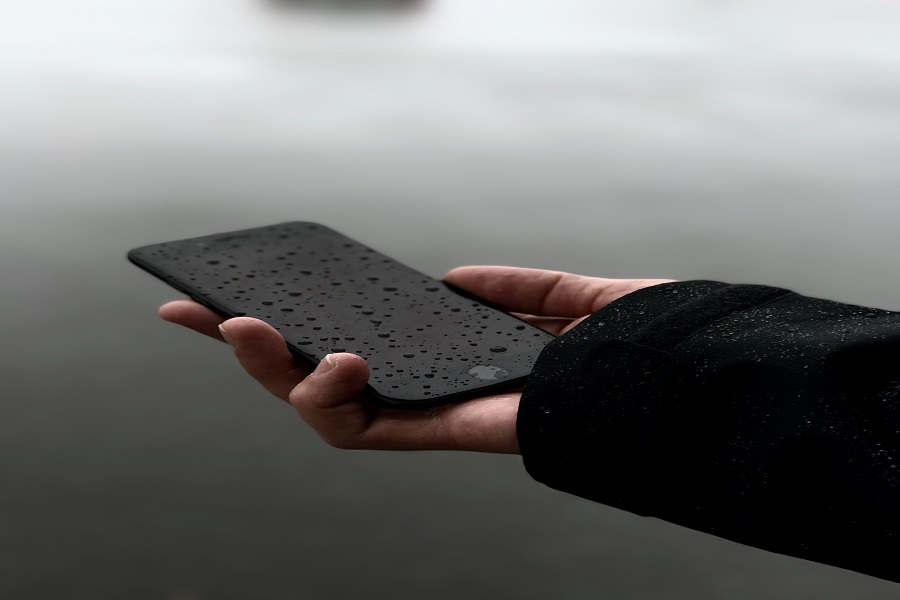
IPHONE 8 WATER DAMAGE REPAIR
If your iPhone 8 is facing a water damage then we provide you different techniques through which you can easily get your iPhone 8 water damage repair.
HOW TO DO IPHONE 8 WATER DAMAGE REPAIR AT HOME?
There are different remedies through which you do iPhone 8 water damage at home easily.
By opening ports:
When your iPhone 8 is drop in the water than quickly take it out from it. After taking it out, power off the device.
Then open all the ports of your iPhone 8. Take out the sim card along with its try and keep them aside, so that they can dry. You should make sure that all the ports are open so that water can get out through them.
Now you try to get the water out from the opening of iPhone 8 by shaking the device. You can also use a blow dryer on cool to dry the water. Blowing the air into the ports can also help in making water dry.
Drying method:
Removing the bottom screws from the body:
One thing you should keep in mind that power off your iPhone whenever you do any repairing operation.
Remove the screws that are placed at both sides of the dock connector. Use the pentalobe screwdriver to remove them.
Opening the logic board of iPhone 8:
Then place the suction cup on the screen and pull it upward carefully in order to release the screen from the bottom of the body.
Now use the pointed side of the spudger tool and try to loosen the screen from the bottom of the iPhone 8.
Then slight the inserted flat end of the spudger tool to widen the gap between the display screen and the body of iPhone 8.
Again slight the spudger toll at the left and right side of the screen to open the screen from all the sides.
After doing this pull the suction cup to open the screen accurately.
Remove the suction cup.
Now further insert the opening pick at the place of spudger tool to break all the remaining adhesive completely.
Now open the display screen from the left hand side as you open the cover of your iPhone
Now remove the four Phillips screws that are placed on the bracket of the lower display cable by using Phillips screwdriver.
Remove that bracket and place it safely aside.
Now use the pointed side of the spudger tool to lift the battery connect out from its housing on the logic board.
By using the finger nail or the pointed side of the spudger tool pull the two lower display connector from the logic board.
Now by using Phillips screwdriver remove the three screws that are placed on the bracket of front panel sensor assembly connector.
Remove the bracket.
Remove the front panel sensor assembly connector from the logic board by using pointed side of spudger tool.
Now you can easily remove the iPhone 8 display assembly from the body.
Now by using the Philips #000 screwdriver remove the two screws that are placed on the barometric vent
Then remove that vent.
Then with the help of the spudger tool try to remove the tapic engine connector from its socket that is placed on the logic board.
Tapic engine is protected by the three Phillips screws so remove them by using Phillips screwdriver.
Then remove the engine.
Then remove the one more Philips screw that protects the Wi-Fi diversity antenna component placed at the bottom of the case.
Then remove the screws that are placed on the speakers by using a Phillips screwdriver.
Now disconnect the two antenna cable connectors from the logic board by pulling it up from its socket.
Deroute the cables from the logic board by using tweezers.
Now remove the cable from the speaker by using the tweezer.
Now push the speaker assembly towards the logic board and try to disconnect it from the rear case.
Now remove the speakers easily.
Now use the sim card eject tool and remove the sim tray by ejecting it in the hole.
Now disconnect the rear face camera by using the flat end of the spudger tool and pry the dual face camera cable connector.
Remove the screws that are placed on the rear facing camera bracket and remove the bracket.
Remove the camera flash cable connector again by using the pointed end of the spudger tool.
Unscrew those two screws that are placed on the upper cable bracket.
Remove the bracket.
Now removing the Wi-Fi antenna by opening the Phillips screws.
After opening the screws remove the top left antenna.
Then remove the two Phillips screws that are placed on the top left side of the body of iPhone 8.
Remove that bracket.
Remove the two screws that are placed on grounding bracket by using standoff screwdriver.
Now bend the logic board grounding bracket by using the tweezer.
Also, remove the lower cable bracket from the logic board by using the pointed side of spudger tool.
Then remove the one Phillips and three standoff screws placed at the logic board.
Take out the sim card eject plunger from the logic board by pushing it using spudger tool.
Now by lifting the logic board from the lower side slide it carefully towards the bottom.
After removing the logic board view it that the corrosion is present in it or not.
Observe all its side. As the 80 percent of the logic board is protected by the shield so you are unable to see that covered part where the water damage is happens.
Now put the logic board in 90 percent isopropyl alcohol.
By using the soft brush rub away all the corrosion.
Again rinse it in alcohol and rub.
Let it dry at least for a day.
Reassemble by reversing the opening process.
By putting iPhone 8 in silica gel:
After trying the above method, if your iPhone 8 is still not responding it means that some moisture is still present in the iPhone 8. Another method to dry the iPhone 8 is to place the device in silica gel. Silica gel absorb all the water. Therefore to remove the moisture from the iPhone 8, you should keep it in silica gel. There are many companies that sell silica gel packets that absorbs the water from the iPhone.
SMART FIX- IPHONE 8 WATER DAMAGE REPAIR AT HOME:
After applying the above remedies, if your iPhone is not working then don`t panic. Smart fix provides you iPhone 8 water damage repair services at your place. No matter what, you are in the office or at your home we provide you with the best services there. You only need to tell us about your device and their issues. We promised to fix all your problems at your doorstep. Whenever you are facing any issue on your phone just book an appointment with us and we will be there for you. We know you are in hurry and we will understand it. Our technicians are expert and tried their best to repair your iPhone 8 on spot. Our technicians never carry your iPhone 8 with them, they reconstruct your phone wherever you want. Our technicians only take 60 minutes for repairing and then the phone is ready to use. Therefore our technicians have all the tools and skills through which they can provide you iPhone 8 water damage repair services quickly.
Affordable Charges:
If you are worried about the prices then don`t worry about it anymore. We will provide you iPhone 8 water damage repair services at reasonable price. We allow you to pay through credit or debit cards. You can pay with cash as well. One of the great policy of our services is that you don`t have to pay any advance. Once your phone is repaired and you are satisfied with our services then you will pay.